Azure configuration
We'll need to create two application registrations for Azure Entra ID B2C authentication to cover both direct API use and usage from the OpenAPI (swagger) documentation.
This guide assumes that an Azure B2C tenant was already created and linked to an Azure subscription.
Backend API
Step 1 - Create app registration
Head over to Azure -> Azure Entra ID B2C -> App registrations, and create a new registration.
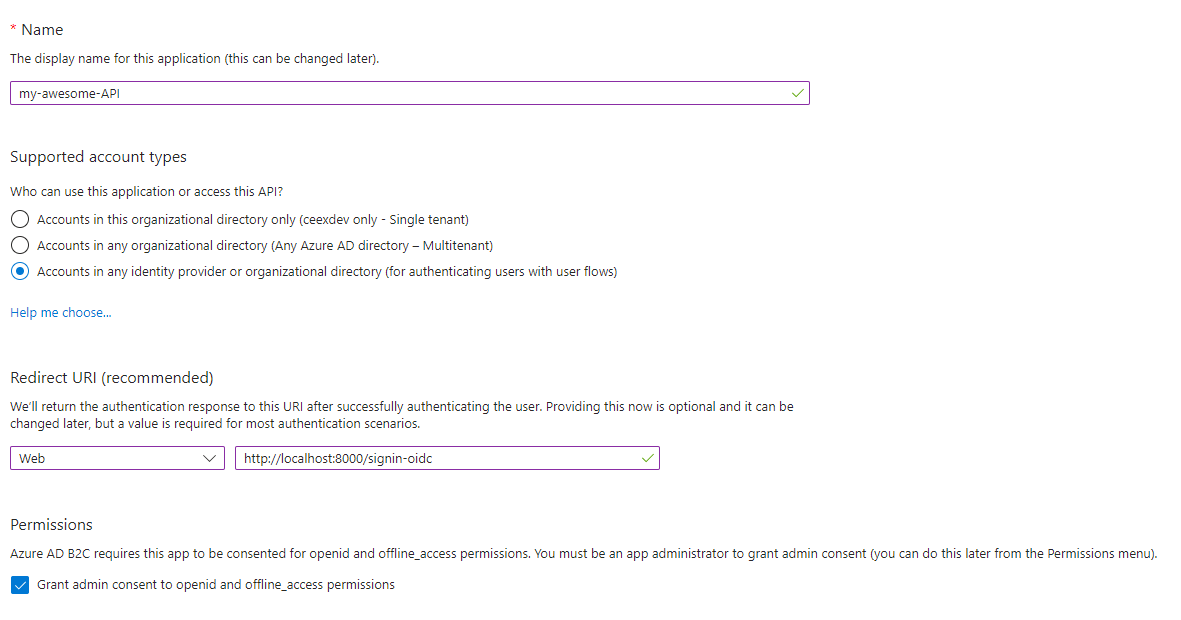
Select a fitting name for your project; Azure will present the name to the user during consent.
Supported account types:Accounts in any identity provider or organizational directory (for authenticating users with user flows)Redirect URI: ChooseWebandhttp://localhost:8000/signin-oidcas a valueGrant admin consent to openid and offline_access permissions:Yes
Press Register
Step 2 - Verify token version is v2
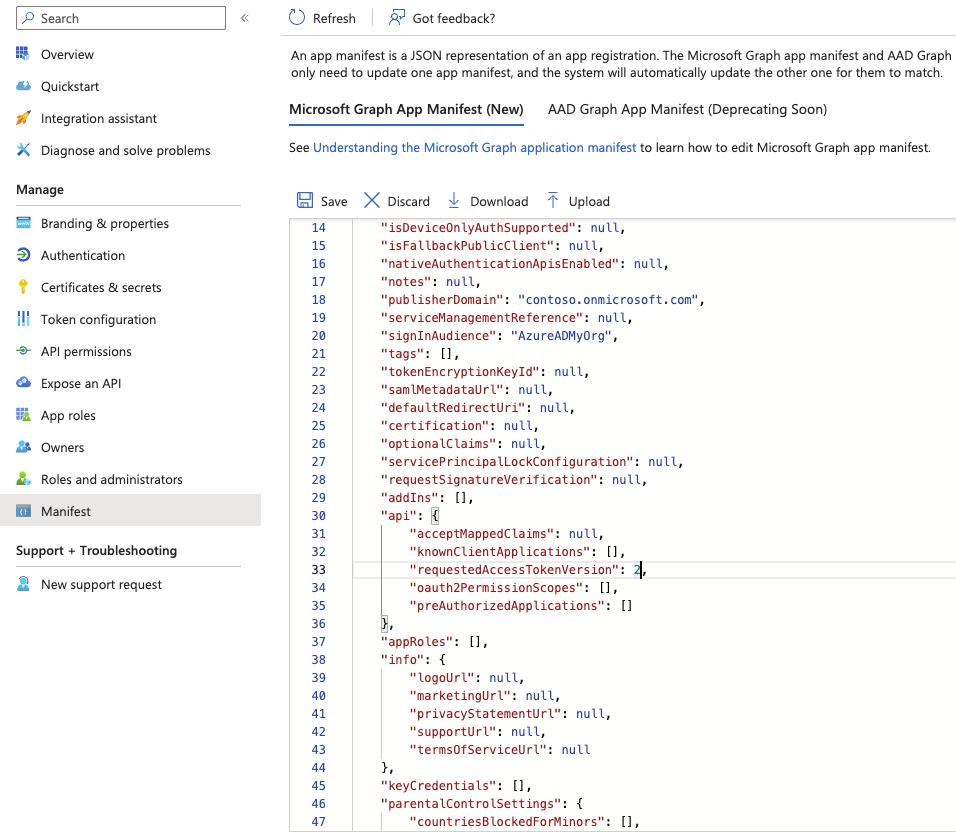
First we'll verify that the token version is version 2. In the left menu bar, click Manifest and find the line
that says requestedAccessTokenVersion. Verify that the value is 2.
Press Save
(A change can take some time to happen, which is why we do this first.)
Step 3 - Note down your tenant name and application ID
Go back to the App Registration Overview, found in the left menu.
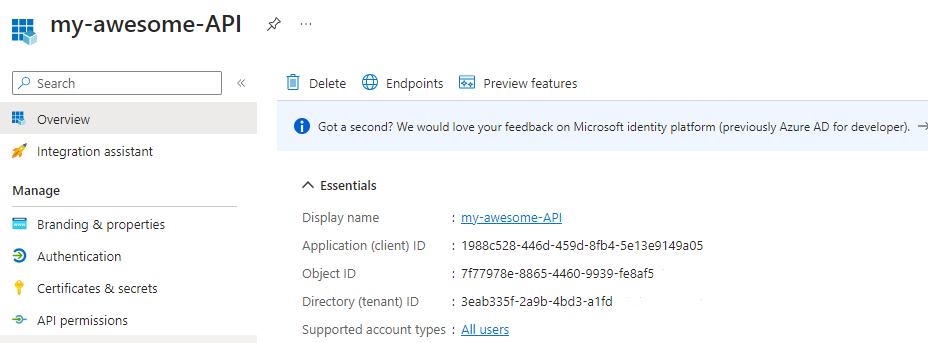
Copy the Application (Client) ID, we'll need it for later. I like to use .env files to
store variables like these:
TENANT_NAME=
APP_CLIENT_ID=
OPENAPI_CLIENT_ID=
AUTH_POLICY_NAME=
Also, in the Azure Entra ID B2C overview get the tenant name from the domain name (without the .onmicrosoft.com part)
and add it to the .env file as well:
TENANT_NAME=
APP_CLIENT_ID=
OPENAPI_CLIENT_ID=
AUTH_POLICY_NAME=
Step 4 - Add an application scope
-
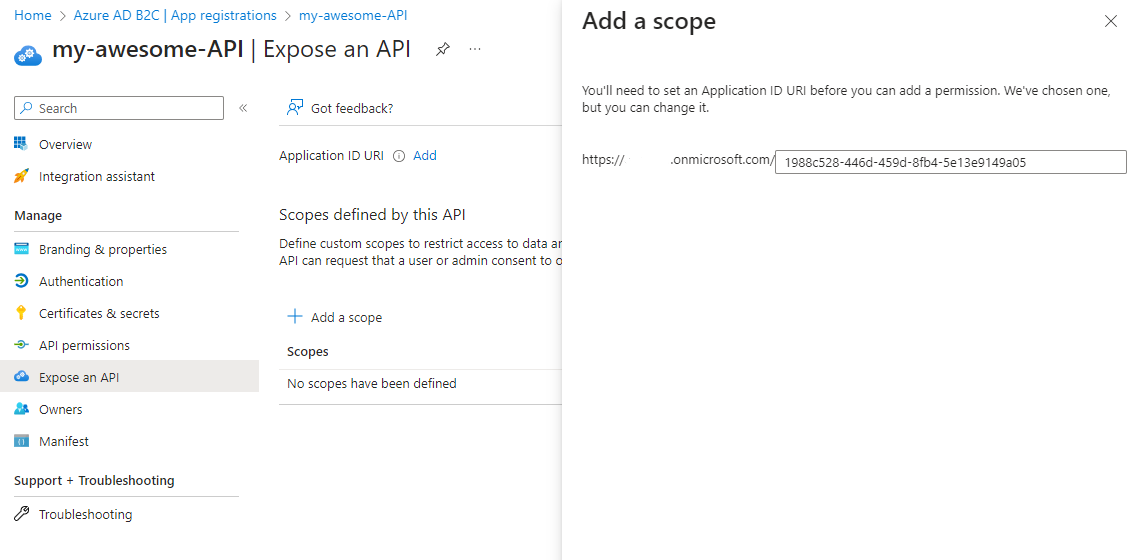
Go to Expose an API in the left menu bar under your app registration.
-
Press + Add a scope
-
You'll be prompted to set an Application ID URI, leave the suggested one and press Save and continue
-
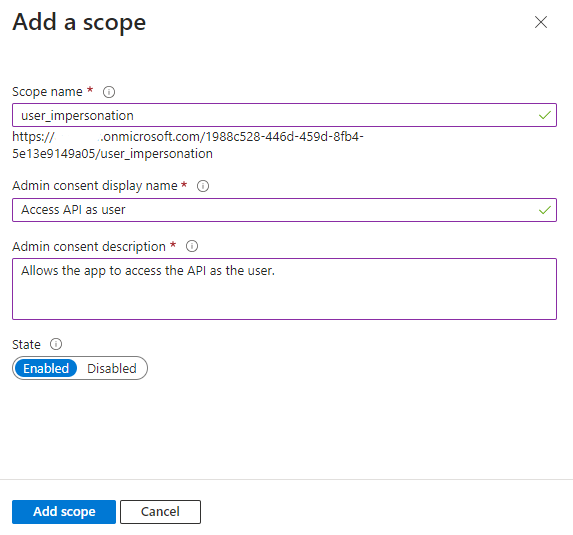
You'll be prompted to set a scope name, display name and description. Set the scope name to
user_impersonation, display name toAccess API as userand description toAllows the app to access the API as the user. -
Make sure the State is
Enabled -
Press Add scope
OpenAPI Documentation
Our OpenAPI documentation will use the Authorization Code Grant Flow, with Proof Key for Code Exchange flow.
It's a flow that enables a user of a Single-Page Application to safely log in, consent to permissions and fetch an access_token
in the JWT format. When the user clicks Try out on the APIs, the access_token is attached to the header as a Bearer token.
This is the token the backend will validate.
So, let's set it up!
Step 1 - Create app registration
Just like in the previous chapter, we have to create an application registration for our OpenAPI.
Head over to Azure -> Azure Entra ID B2C -> App registrations, and create a new registration.
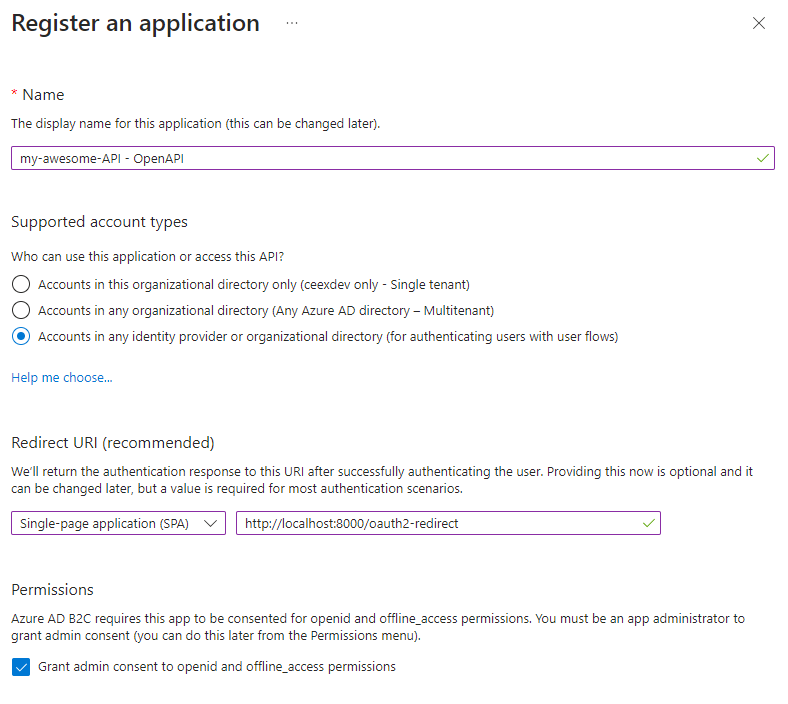
Use the same name, but with - OpenAPI appended to it.
Supported account types:Accounts in any identity provider or organizational directory (for authenticating users with user flows)Redirect URI: ChooseSingle-Page Application (SPA)andhttp://localhost:8000/oauth2-redirectas a valueGrant admin consent to openid and offline_access permissions:Yes
Press Register
Step 2 - Change token version to v2
Like last time, we'll verify the token version is set to version 2. In the left menu bar, click Manifest and find the line
that says requestedAccessTokenVersion. Verify the value is 2.
Press Save
Step 3 - Note down your application IDs
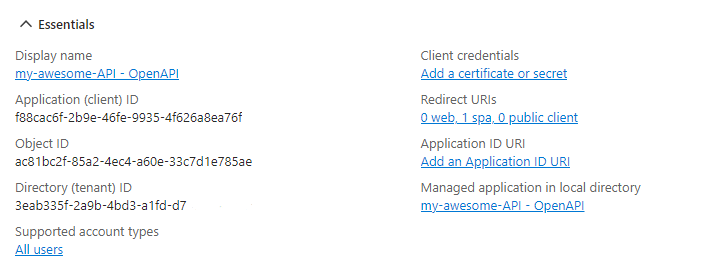
Go back to the Overview, found in the left menu.
Copy the Application (Client) ID and save it as your OPENAPI_CLIENT_ID:
TENANT_NAME=
APP_CLIENT_ID=
OPENAPI_CLIENT_ID=
AUTH_POLICY_NAME=
Step 4 - Allow OpenAPI to talk to the backend
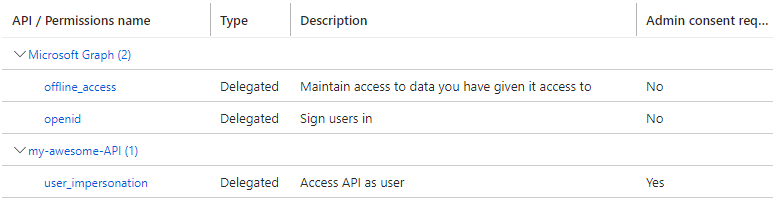
To allow OpenAPI to talk to the backend API, you must add API permissions to the OpenAPI app registration. In the left menu, go to API Permissions and Add a permission.
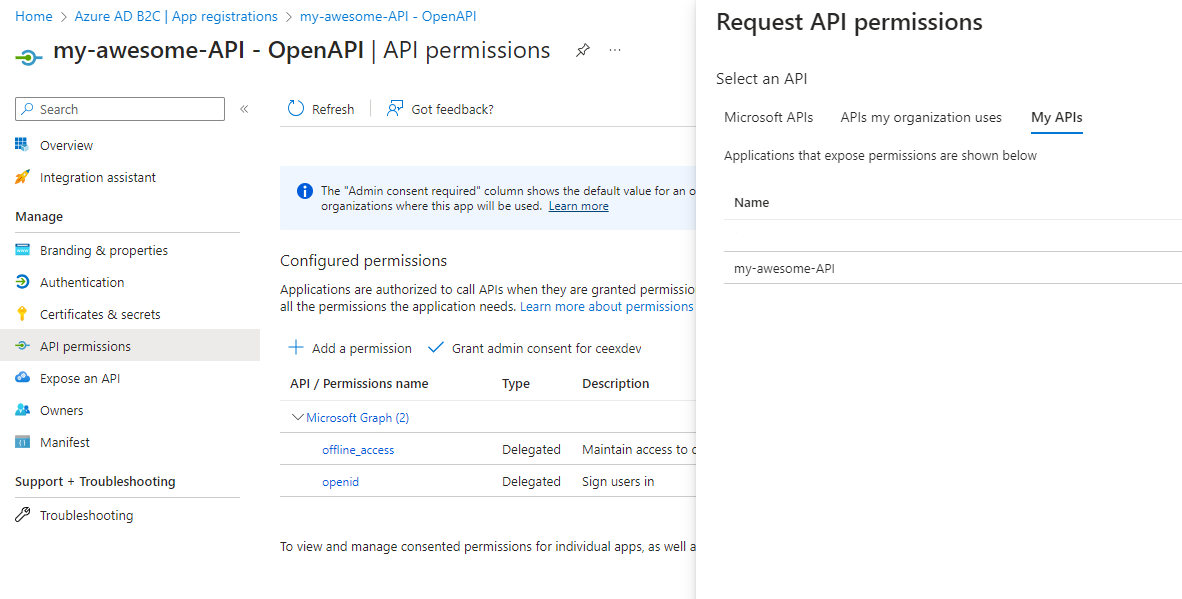
Select the user_impersonation scope, and press Add a permission.
Your view should now look something like this:
That's it! Next step is to configure the FastAPI application.
User flows
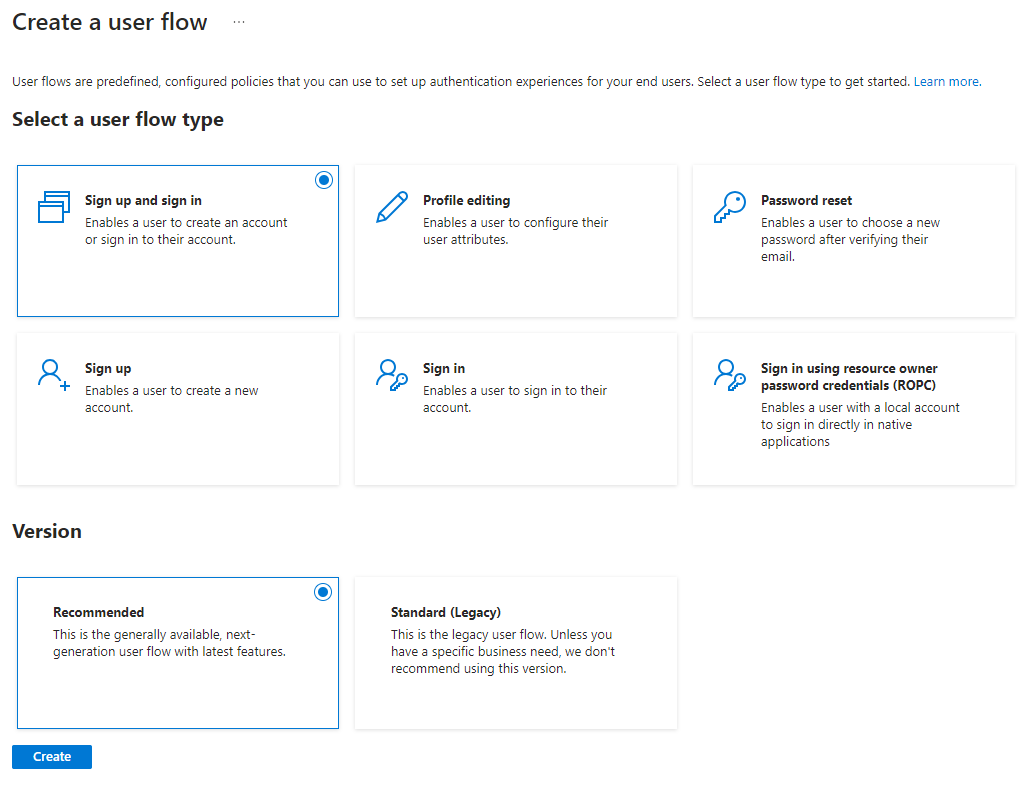
Step 1 - Create a user flow
Head over to Azure -> Azure Entra ID B2C -> Users flows, and create a new user flow.
Select a user flow type of Sign up and sign in with the Version Recommended, then press Create.
You are prompted to fill out details of the new user flow.
Give it a name of sign_up_sign_in (note that B2C_1_ is already prefixed), and choose Email signup as the identity provider.
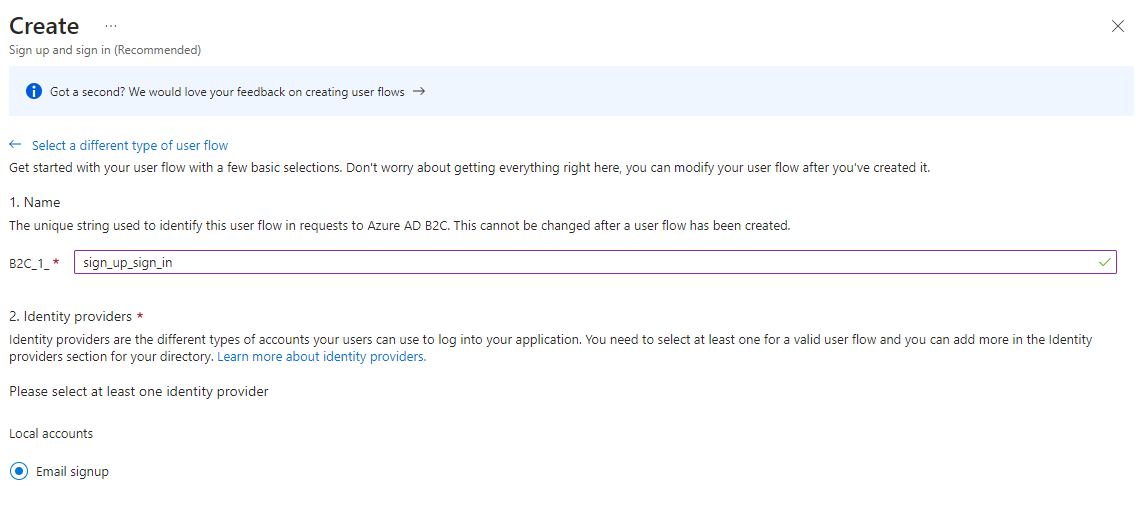
Keep all defaults for now and choose user attributes and token claims as required, and press Create

Step 2 - Note down your User flow name
Copy the User Flow name just created (including the B2C_1_ prefix, e.g. B2C_1_sign_up_sign_in)
and save it in the .env file:
TENANT_NAME=
APP_CLIENT_ID=
OPENAPI_CLIENT_ID=
AUTH_POLICY_NAME=B2C_1_sign_up_sign_in
That's it! Next step is to configure the FastAPI application.